
Step One- The Ingredients
Gather together the items you’ll need to “bake” your
cake. The Dollar Stores often have a
great selection and huge savings, so check there first.
Ingredients list:
45 Size 2 Diapers
10 Pairs of Baby Socks
14 Face Cloths
4 Bibs
1 Burp cloth
2 Teethers and a cute “stuffie”
1 bottle of wine (for moms-to-be that like to drink) OR 2
small jars of baby food and one large
16’ Circle Cardboard Cutout (for base)
No Pull Kid Hair Elastics (preferably clear but as you will
see I used colored for some)
6 regular elastics (2 smaller, 3 larger)
Couple Safety Pins
Ribbon (3 rolls or one x-large)
Glue Gun
Cello-Wrap
Packing Tape
Step Two- Preparing the Diapers
Roll all the diapers and fasten with a hair elastic. Make sure the diaper prints/colors are rolled
inside so only white shows. (In Canada,
Pampers don’t have prints all over the diaper)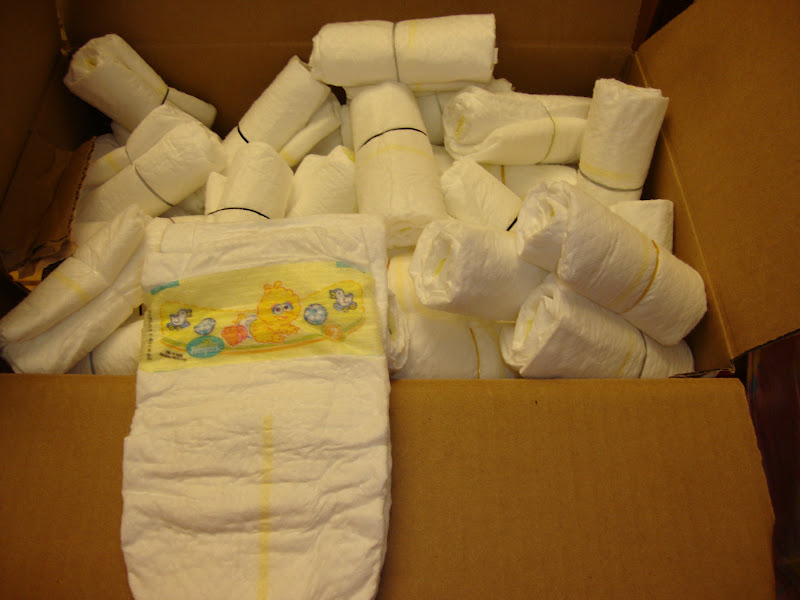
Step Three- Assembling the Cake
Place bottle of wine (or baby food taped together to form a
tower) in the center of your cardboard cutout; put a small elastic around the
tower and add diapers. 
Place a larger elastic around the first base of diapers and
add a second layer of diapers.

Repeat for a third and final base layer of diapers with a
larger elastic.

For the second tier of the cake repeat the above process
adding only 2 layers of diapers


For the last and final tier, use a small elastic to add only
one layer of diapers.

Here is what your “Undecorated” cake should look like.

Step Four- “Icing” the Cake
For the first and largest tier of the cake, it is most
economical to use baby socks. It helps with design if you lay your socks all
around the cake to determine where they will be placed.
Carefully remove one white diaper at a time from the outer
layer of the first tier and place a baby sock over top and then replace.

Repeat until all outer white diapers are covered.

For the second tier “icing”, I used facecloths (4 for $1)
and you simply wrap the outer layer of diapers with them and use a clear hair
elastic to secure.


For the third tier I used bibs to “ice” 4 of the white
diapers and then I rolled one burping cloth in lieu of a diaper to compose the
5 diaper top tier.

Step Five- “Decorating” the Cake
Cut ribbon to fit the circumference of each tier and secure
with a dab of glue at the back of the cake.
I used a small amount of glue to secure the teethers on the
cake and used safety pins to secure the cake topper (stuffie).

Step Six- Packaging the Cake
Using one roll of cello-wrap and some packing tape wrap up
your “yummy” cake and add some ribbon for a finishing touch.


Step Seven- The “Recipe”
Add the following “Recipe” card so that the Mommy-To-Be
knows how to enjoy her cake and what ingredients were used.
And that my friends, is how you “Bake” a yummy Diaper Cake!

GInger, you are a genius! This is SOOOO creative and SOOOO practical all at the same time :)
ReplyDeleteYour Hippo diaper cake looks absolutely gorgeous!
ReplyDelete